(GUIDE)(FM-Towns) How to create and format an HD image and install DOS with CD support.
HOW TO CREATE AND FORMAT AN HD IMAGE AND INSTALL DOS WITH CD SUPPORT
Last updated: 7 October 2018. Fixed Unz Emulator and an image link.
What do you need before starting:
- Unz Emulator (can be found
dead linkhere ) - MS-DOS v.6.2 Boot Disk (named Microsoft MS-DOS v6.2 L10 (1993)(Microsoft)(JP) in the latest TOSEC set)
- MS-DOS v.6.2 5 disk set (starting with MS-DOS v6.2L10 (1994)(Fujitsu)(JP)(Disk 1 of 5) in the latest TOSEC set)
Instructions:
1. Start Unz. Select Settings and then Property. Click on Imputs tab and change “Input port – Port 1? to None. This is needed for the keyboard to work properly.
2. Click the HDD tab, click Mount(0). Click on Look In and go to the directory in which you wish to create the HD image.In the “File Name” write the name you wish to assign to the HD image and click Open and then Yes. Write the desired size of the HD image and click OK twice.
3. Select File and them Reset. Select Drive0 then Insert and select the MS-DOS v.6.2 Boot Disk image.
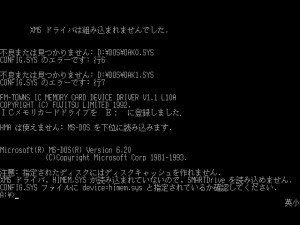
4. Wait for DOS to load. Then you should get a screen like this:
Write then setup2 at the prompt and press Enter.
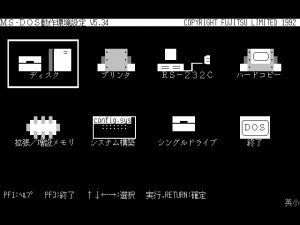
5. The screen now should look like this:
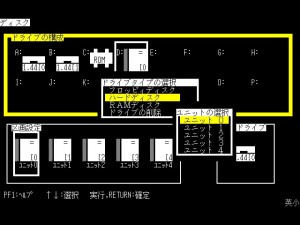
Press Enter and move to D:, then press Enter and select the 2nd option and press Enter again.Then select the 1st option and press Enter again. You should have faced this screen:
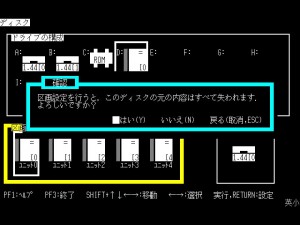
6. Press Tab, then press Enter. When asked, press Y. Screenshot:
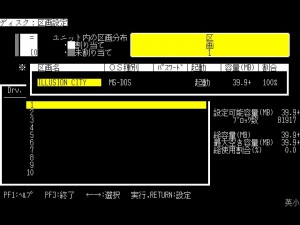
7. Press Enter on Drv. No. 1 and you will be presented with five columns related to the HD.
- In the first column press Enter and then write the desired label for the HD and press Enter again.
- In the second column press Enter, select MS-DOS and then press Enter again to go to the third column.
- Press the right arrow to go straight to the fourth column.
- Press Enter and select the second option (which means “active” ) and press Enter to go to the fifth and final column.
- Press Enter and hold the right arrow until the gauge reaches 100%. Press Enter again.
If you did well, you should be in a situation like this:
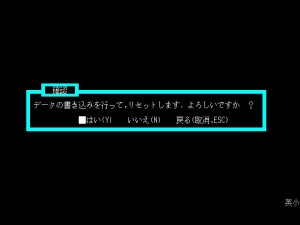
8. Press F3. Then press F3 again twice. When asked type Y. Screenshot:
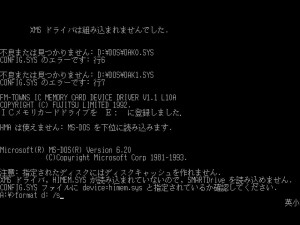
9. Unz will reset. Wait for it to load and then write format d: /s and press enter. If you have problems for typing characters, go to Settings, then Proprietes and select the Keyboard tab. Then click on Change Key Configuration near the JIS Keyboard and set the keys as you wish. Screenshot:
When asked press Y. Then you will be asked to type
the label for your HD. If you want to do so, type the name you have
chosen and press Enter. Otherwise, just press Enter.
10. Congratulations! The format process is over and
now your HD is booting. If you want to install a more substantial
version of DOS and have CD support, however, some more work is needed.
Insert MS-DOS v.6.2 first disk in Drive0 and go to A: if you haven’t done so, by typing a: and pressing Enter in the DOS prompt.
11. Copy all the files in your new HD by typing copy *.* d: and
pressing Enter. Wait for the process to finish and then Insert the next
disk image (there should be a total of five disk images).
12. Repeat the process described in point 11. for the
second, third, fourth and fifth disk image. When you have copied the
fifth and last disk image, eject it by going to Drive0 and then selecting Eject.
13. When you are done with the copying, you have to
edit the autoexec.bat and config.sys files in order to make the CD drive
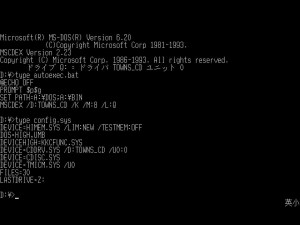
fully operational. Write d: on the DOS prompt and press Enter. Then write edit config.sys and modify it’s contents until they are the same of the ones shown in the screenshot below. Save the file by pressing Alt, pressing the down arrow and then selecting the option ending with an S (if i remember correctly, it’s the third). Then press Alt again, press the down arrow once more and select the last option in the row. This will bring you back to the DOS prompt. Write edit autoexec.bat,
press Enter and change it’s contents in order to match the ones shown
in the screenshot below. Save and quit by doing the same operations you
did for the config.sys file. Screenshot:
If you are lazy and you don’t want to mess with the editing process,
I’ve created a disk image with both autoexec.bat and config.sys files
ready to use. It’s sufficient for you to copy the disk content in your
hard drive by typing copy *.* d: and pressing Enter. Remember that you need to be in a: to do so correctly! Download the disk image here.
14. Reset your system by going to File and then selecting Reset. Now you should be able to access the CD drive by writing q: and pressing Enter. Congratulations!
